As a yoga practitioner I have learned many helpful things that I can apply to my life as a member of The Church of Jesus Christ of Latter-day Saints. I believe anyone can apply the following suggestions and find benefits. Living a balanced life with mind and spirit at peace is what Yoga is all about. And it is how the Savior lived. He put his trust in his Father and we must do that too.
1. SLOW DOWN Do less, and do it with more attention to detail. Become mindful of WHAT you are doing, WHY you are doing it, and HOW best to do it, in accordance with your abilities. Determine what your mission is at this time in your life. Unclutter your life (and your house), and determine to live with Jesus Christ at the center of all you do.
2. PRAY FIRST Begin each day on your knees and ask for help in all you plan to do that day. Be specific. Then pause, listen for inspiration, make plans accordingly. Don't plan too much.
3. MOVE SLOWLY & GRACEFULLY Walk upright, and breathe as you move. Keep your body relaxed. (Ever notice how the Savior moves in all those Church films?) Imagine energy flowing upward through your body, lifting you. A small smile relaxes the face and avoids stress lines. At stop lights, relax and take long, deep breaths. When the phone rings, take a deep breath before answering it. Try to respond smoothly and efficiently, rather than in a rush.
4. BREATHE Every couple of hours, walk outside, take some deep breaths, notice the sky, trees, flowers, people passing by, the touch of sun, rain, air on your skin. Crush a leaf between your fingers or pick a flower and smell it. Offer a brief prayer of thanksgiving. Take a walk, even slowly, just around your garden, noticing everything. A physician has said that most stress-related diseases could be prevented if people would just learn to breathe more deeply!
5. PRAY OFTEN Offer a prayer for a stranger passing by, a homeless person on the corner, the refugees in camps around the world, government leaders, specific people you know. Spend a little more time thinking of others. NOTE: An ambulance siren is always a cue to pray!
6. EXPRESS LOVE It strengthens your immune system to do loving acts of kindness. Write a complimentary note to someone. Take someone a flower for no reason, even your husband or one of your kids. Touch a person's arm when you speak to them. (Non-invasive, but sensitive.) Compliment the little old lady buying carrots at the produce stand, or the checker ringing up your groceries, or the janitor sweeping the floor. Make someone's day with a kind word.
7. ASK THE SAVIOR TO CHANGE YOUR NATURE not solve your problems. When we become more Christ-like ourselves, the problems are more apt to resolve themselves. We are not here to avoid the trials of life, but to allow the Savior to transform us so that the only discomfort is separation from the Lord.
8. TAKE TIME EACH DAY FOR SOME YOGA Maybe you only have time for three postures. Do those three postures with attention to details, the breath, and finding your edge for a hold of only a few seconds. Even a little yoga centers you, gets the sleepy kinks out, energizes you, and helps get you ready you for your day.
It takes practice to create a balanced life. Sometimes you really have to endure a very busy day, but gradually try to incorporate more of these suggestions into your days. Different times of our lives place different demands on us, but it is always possible to make a little change, and those little changes can make a huge difference.
Saturday, November 1, 2014
Monday, October 27, 2014
Yoga As a Metaphor for Gospel Living - Mountain Pose & Standing Forward Bend
You will notice in reading my profile that I am a member of The Church of Jesus Christ of Latter-day Saints. Throughout the history of Yoga, the practice has included spiritual teachings as part of the uniting of body, mind and spirit. The spiritual beliefs and practices of the guru or "teacher" are often reflected in the physical and other practices of yoga.
As I incorporate my spiritual beliefs into my yoga teachings, I invite you to incorporate your own personal beliefs as metaphors, to help you meet the challenges of your life as well as to enrich your personal practice on the mat. You can use my ideas as a guide.
In The Church of Jesus Christ of Latter-day Saints (for the sake of brevity, from here on referred to as "the LDS Church) we have a lay ministry. This requires that all members of a certain age hold "callings" or responsibilities, for which we are set apart through priesthood authority, giving us the support of the Holy Ghost in our specific individual calling. After a time, we are released from one calling and given another. As a result, our responsibilities and obligations change, we acquire skills in a variety of areas, from teaching a class, to leading an organization, serving as a member of a bishopric, doing clerical work, camp director, Scoutmaster, nursery leader, etc. While this is a wonderful way to develop our talents and to learn new skills, of course there are attendant challenges, stresses, and fears that arise, simply because we are just ordinary people being asked to do some extraordinary things!
In my experience, yoga has helped me in many ways to adapt to this way of life. I was a convert to the LDS Church at the age of 19, and so, it was a huge challenge for me to take on responsibilities with which I had no previous experience, sacrifice my personal time (often with young children to care for) to fulfill my church obligations, and especially, learn to exercise faith that the Lord would help me succeed in all I was required to do. When Yoga entered my life, I learned about balancing my time and activities, setting priorities, and recognizing my own limits so I wasn't pushing myself to the breaking point, and even how to be a "disciple" with Jesus Christ as my Leader and Teacher. I learned to look inward to identify what my fears and self-limiting beliefs were, where they came from, and what to do about them. Through my years as a yoga teacher, I also learned that latter-day saints are not the only ones with challenges to face, and that everyone, regardless of their religion or other differences, has pretty much the same stresses to deal with. So, I hope as I use my own experience and speak to my LDS followers, anyone will be able to relate to what I have to say, with experiences of their own.
With that in mind, come into Mountain Pose, standing with feet parallel, a few inches apart, toes pointing forward; bring up The Squeeze, roll the shoulders back and down, and with an inhalation allow the arms to slowly rise out to the sides, upward, turning the palms up at shoulder level, and on overhead. Keep the shoulders relaxed, away from your ears as the arms lengthen upward. Hold here and breathe steadily, as you relax any unnecessary tension in the shoulders. Feel your feet pressing into your mat, how the Squeeze holds your torso steady, and looking inward, watch energy flow upward from the earth beneath your feet through your entire body and out through the fingertips. Allow yourself to take on the qualities of a mountain: firm; steady; enduring; immovable; strong.
From the top of your mountain, see your life in true perspective. See who you are in all the many roles you play; see where your strengths lie; see what it is that holds you "in place"; see what it is you "stand for"; see where you are "immovable"; gaze into the past and acknowledge the "seasons of storms" that you have endured; know that your future holds many challenges and "seasons" yet for you to endure. Where are the weaknesses that, with the Lord's help, you can turn into strengths? Where are you being required to be a strength to others? Who, in your immediate family or circle of friends do you look to for strength? What else comes to mind as you hold Mountain Pose?
Hold to your edge, then slowly release the pose and relax. You might want to journal something that came up for you as you experienced Mountain Pose.
To complete today's practice, come into a version of Standing Forward Bend that works for your body. You may want to rest your hands on blocks, or on the seat of a chair. Keeping your knees soft, allow the spine and neck to relax as you fold forward. This is a posture of submission, and counter-poses Mountain Pose, a posture of power. Breathe as you just hang out here; relax the spine, and let go of striving; feel a sense of submissive acceptance of things as they are, of yourself as you are; watch how your mind begins to calm down; allow yourself to be soft, reverent, and teachable, knowing that your loving Heavenly Father is with you, ready to guide you and help you through all of life's challenges. Know that as you remain prayerful, keep his commandments and do your honest best, the Savior's grace will carry you along. You will find the answers you need, the strength you need, the help you need, as you humbly submit your will to the Father's.
Roll slowly up out of the pose. Do a few Swinging Twists accompanied by deep breaths, and go on with your day!
Tuesday, October 21, 2014
Safe Inversions
Safe Inversions
The benefits of inverted postures are many: increased blood flow to the brain and face leads to clarity of mind and a healthy complexion; lowering of blood pressure as blood returns from feet to heart with less exertion by the heart gives the heart a rest; draining stagnant blood from the legs to help prevent varicose veins; stimulation of digestive system for healthier digestion and elimination. Mentally, the inversions have a calming, meditative effect, restoring order to our lives.
Headstand is the most commonly thought of inversion posture, but balancing on the head, with the weight of the body being carried by the neck, can be very dangerous for many people, especially those starting yoga practice later in life. Headstands are definitely contra-indicated for people with osteoporosis or any neck or spinal problems.
You can safely get the benefits of Headstand by choosing from the following alternative postures. Bear in mind that an "inverted posture" is any in which the head is below the heart. So we'll begin with Standing Forward Bend.
This posture is easily modified by resting the arms on the seat of a chair. Keep the knees a little soft, to protect your lower back. Allow the head to hang from the relaxed neck, like a piece of fruit hanging from a vine. Breathe, relax, feel, watch and allow. Sigh out the breath. You may sense a feeling of submission, of letting go of striving, of allowing things to be as they are. If your hands don't reach the floor, clasp elbows and let the weight of the torso provide a comfortable stretch. Come up very slowly as if stacking your spine one vertebra at a time, like little building blocks. Experience that "yog-ahhhhhh" feeling!
Moving on now to Downward Dog, we rise into the pose from Table Pose, pressing the tailbone upward as we press the heels downward. Extend the arms as if telescoping them open, and allow the chest to float toward the knees. Relax the neck and allow the head to hang freely as you take long, full breaths in and out. This posture stretches and opens the entire back of the body, reminding you that throughout the day, yoga "has your back"! The deep breaths oxygenate the blood flowing to the brain to help you wake up and think clearly, so this is a good inversion to do in the morning. It is a major part of the Sun Salutation for this very purpose! Following Downward Dog you may choose to rest in Child Pose, or walk the hands toward the feet and roll slowly up to standing to continue your practice.
This next inversion is called Dolphin Pose. It is the first pose in the "headless headstand" series.It is important to notice that the head is not resting on the mat or on the hands. There is space between the crown of the head and the floor. Remember that we are protecting the neck from injury in the next few postures by not putting any weight whatsoever on the head.
This is the Dolphin Pose with Leg Extended. The leg extension moves us closer to Headstand by getting the foot and leg up there where the blood can drain to the heart. An added benefit from Dolphin Pose with Leg Extended is strengthening the shoulders. Breathe fully in the posture, and don't be concerned if you can't hold it very long. The arms and shoulders strengthen quickly with regular practice.
This is Headless Headstand done against a wall. Just as in Dolphin Pose, the head is free from carrying any weight. It may be easier for you at first to have another person catch your leg as you kick it up toward the wall. Once the first leg is in place, the second leg follows fairly easily. Again, this posture can be difficult at first, but gets easier with practice.
Finally, my very favorite inversion, Headless Headstand on Chairs. This posture is so comfortable, you will want to stay here for a long time, enjoying the peace and calm, while your body absorbs the many benefits with very little effort. I am using two folding chairs placed on a non-skid surface, and I have padded the seats with folded blankets. Face the wall and bend forward, placing your head between the chairs, feeling your shoulders rest on the chair seats. Clasp the rungs of the chairs with your hands and kick the feet up against the wall. The head hangs free, the blankets absorb the weight of the body, and you can relax in this position as long as you choose. To exit the pose, slowly bring the feet down, and rest in Child Pose for a minute or so before returning to an upright position.
I hope this helps you find an inverted posture that works for you!
Symbolically, inverted postures are about remaining calm and focused when our world "turns upside-down". So next time you find your life spiralling out of control, find a quiet spot to do some inversions, and you may realize that out of chaos a new, better order is evolving!
Yoga Notes
When preparing to do the Headless Headstand, either on the floor or on chairs, prepare by first doing one of the milder inversions. This gets the blood flowing gently toward your head. When you subsequently enter the more extreme posture, you won't feel the pressure of the sudden flow of blood to the head, which can sometimes cause a headache.
Once you come out of the headstand, rest briefly in Child Pose to equalize the flow of blood throughout your body once again, then return slowly to an upright position.
Friday, October 10, 2014
The Inner Work of Yoga: Postures as Metaphors for Life
As you begin to hold the postures a little longer, stay with the posture and its sensations as you examine the impressions that arise during the holding. How does whatever you are experiencing on the mat correlate with what is happening in your life off the mat? Here are some examples of how to do this:
Come into Warrior One or Front Warrior
Hold the pose as you B, R, F, W, & A.
What feelings does this posture bring up for you? Do you feel confident, like a warrior? Strong and capable? Where or how are you feeling confident in your life right now? Are there positive results coming out of that?
Or maybe you feel fearful, or weak, as if you might fall out of the pose. In what area of your life are you feeling weak or fearful now? How is that affecting you? Can holding this pose a bit longer, breathing more deeply, help you to feel more courageous and confident? Is there a way you can modify a challenge in your life so that you can feel more confident and strong? Anything you could be doing differently? Do you need to use a "prop" in the way of someone to help you? Hang in there just a little longer; you may be surprised by your hidden strength!
Let's see what we can learn from Triangle Pose.
In this posture you are looking upward, from a different perspective than you are use to. How might "looking at things from another perspective" help to resolve an issue in your life? In a relationship? In a career change? We can get set in our ways of being and thinking and seeing. Extend the arms outward and feel your heart open to change, to new ways of seeing and being. Embrace change as an opportunity for growth, expansion and progression. Maybe you just need to open to another's way of seeing things. Ponder these things as you hold and breathe. Let the impressions arise without forcing them.
Bridge Pose is full of possibilities for introspection!
What is a bridge? It's something that connects two poinnts separated by something impassable. Where are you experiencing separation in your life? In a relationship? Between your dreams and aspirations for your life and where you are today? Your natural self, held back by weaknesses and poor habits, and the person you want to be? What might you do to "bridge the gap"?
Another consideration is the posture itself, with the head below the heart. Picture the love and kindness in your heart flowing gently downward into the practicality and sensibility of the mind. Is there a situation in your life that might benefit from being less "in your head" and more "in your heart"? Consider judgments toward yourself or others. How might you benefit from less logic and fewer "shoulds", and more love and forgiveness? B, R, F, W & A as heart energy melds into the mind!
I love the metaphorical aspects of Cobra!
Think of a snake, periodically shedding its old skin to reveal a bright, new skin. What old habits might you choose to shed so that you can stand anew? Try entering Cobra with no hands, just the strength of your back. Are you strong enough to let go of old, self-limiting beliefs and glide into a new way of being in your skin? As you rise like a Cobra out of the comfort and safety of your basket, let the music of life entice you into new adventures, new experiences, new opportunities for happiness!
After meeting all those new challenges in your life, here is Child Pose, ready to comfort and nurture you as you crawl back into the safety of your own loving self.
This posture counterposes the back-arching poses that put our heart out there, taking chances and exploring our strengths and weaknesses. It feels good to come home to Child Pose whenever you reach the point where a little self-nurturing is needed. Just curl up in your crib, close your eyes, and even suck your thumb if you want to! Child Pose honors all the emotional parts of us and tells us "Take it easy, you are fine, just as you are!"
And now, Corpse Pose.
Metaphorically, Corpse Pose is about opening up into a place of complete trust, with our soft underbelly exposed. Can we completely relax into the vulnerability of this pose? Do we truly trust that life is evolving for us just as it should, and that we can handle whatever life hands us? Do we really believe that God will never ask more of us than we can deliver, with His help?
I hope you enjoyed this session, as you learn about the inner work of yoga. Whatever postures you choose for your home yoga session, take the time to examine what comes up, as you hold and breathe fully. Don't be surprised if you experience tears and sadness at some times, joy and elation at other times. Those feelings and emotions are all there within you, and sometimes a yoga posture provides just the right opening to finally release them. Keep a box of tissues handy, and KEEP BREATHING!
Wednesday, October 8, 2014
Creating A Home Yoga Session
Choose a time when you will not be disturbed. Early morning is a good time for most people. If you have children, you will have to consider their schedule. Give yourself a minimum of 30 minutes; 45 minutes to an hour is really nice!
Find a space that is roomy enough for you to lay on your back and spread your arms and legs in both directions. Feel that you have enough room to extend as far as you can in all directions. Be sure the temperature in the room is comfortable, not too warm, not too hot.
Wear stretchy or baggy clothing that allows full movement, with no tightness in crotch or around the waist.
Assemble all your props.
Centering: Sit comfortably on your cushion(s); press tailbone downward, crown of head upward, roll shoulders back and down, feel heart center open. Take long, slow, deep breaths in and out through the nostrils. Bring your awareness into the body; notice any tightness, soreness, even emotional issues you are currently dealing with. Acknowledge whatever is going on with you, and see if you can set it aside to deal with later, with an intention to honor any physical limitations. You can inhale a full breath and exhale "OM" or "YUM" or "MOM" or any sound that grounds you in your body--or just sigh out the breath. The first Yoga Sutra of Patanjali is "And now, Yoga!" You are ready!
Warm-ups: Move slowly, remembering to breathe, to gently warm up the spine, the neck and shoulders, the torso, the hips, and the legs. Warm-ups can be done on the back, seated, or standing. Do as many as your body is asking for, or, if you are not yet in tune with your body, follow the warm-ups on this blog or in a book of gentle yoga. Be compassionate toward your body in regard to stiffness, soreness, or other issues.
Standing postures: Come to a standing position through Downward Dog, rolling slowly up. Choose 3 or 4 standing postures, holding each pose for 5 - 8 breaths, performing them slowly and meditatively: breathe, relax, feel, watch and allow. Consider the metaphorical or symbolic aspects of the poses. Relate them to yourself, as you are today.
Balancing postures: Do one or two balancing postures, keeping the gaze on one point, the mind calm. Hold for the same number of breaths on each side. Notice how some days your balance is off, sometimes you are more steady. This is how our lives are! Accept where you are today. If you fall out of the pose, simply repeat it, even using the wall for support if you need to. Try not to ever leave a balance pose having fallen out of it. Find a way to transition gracefully out of the pose before you go on. This has an important effect on your mental attitude.
Rest: Come down onto your mat, on your back, keeping the eyes open, as you relax briefly and notice the effects you feel as a result of your standing practice. There are many internal sensations, full breathing, etc. happening. Be aware. Breathe, relax, feel, watch & allow. After about a minute, draw one knee up to the chest, and as you exhale, press the leg into the ribcage. Hold it there and breathe about 5 breaths. Then repeat on the other side. This releases tension in the lower back that may have come up during the standing postures. Add any other gentle movements, such as rocking from side to side. Then roll over onto your belly.
Belly-down postures: The combination of Cobra, Locust (modified as "Downward Facing Boat"), and Bow, with Child Pose in between, is a good practice for the spine and for building core strength. Hold each pose to your personal edge, then release gently into Child Pose. Take your time. From here, come into a seated position.
Seated postures: The seated postures include forward bends, twists, arm balances such as Half Circle Pose, Side Lift, Plank, and Inclined Plane. Remember to use your cushion under your tailbone and your strap as necessary.
Inversions: You have probably already done Downward Dog Pose, which is an inversion, as is Dolphin Pose. Consider now a supported Half Shoulderstand: on your back, cushion(s) under the hips, legs extended vertically. Or, rest the legs on a couch or chair. Relax in this pose for several minutes if you have the time, but for at least 3 minutes. Then slowly release onto your back.
Deep Relaxation: Do not skip this! Up to now, you have been "mixing the cake" and now it is time to "put the cake in the oven"! During Deep Relaxation, your body integrates the effects of the yoga practice, for the most benefit to body, mind and spirit. So come into Corpse Pose, using any props shown in an earlier post (if it is chilly, cover yourself with a light blanket), even play some meditative music (no tune or beat for the mind to get caught up in, please), and progressively relax each leg and foot, arm and hand, belly, spine, and so on, up through your body. Even imagine your brain softening! Take a minimum of 5 minutes, more if you have time.
Gently, roll to one side and return to a seated position.
Closing: Take a moment to notice how you feel. Maybe you'll decide to form an intention for your day, something that may have come up in your practice. You may want to just sit a few minutes and follow your breath in and out, enjoying the state of calm you are in a little longer. You might want to chant "OM" or simply take a deep breath in and sigh it out with a nice long "Ahhhhhhhhh!"
Have a great day!
Tuesday, October 7, 2014
What are the benefits of yoga, and can it help with weight loss?
Most people associate yoga with the postures, and many people think they can't do yoga, because they aren't flexible. Yoga is about becoming more flexible, just as practicing tennis helps you learn to eventually hit the ball.
We call it "yoga practice" because it is progressive; there is always more to learn, and the body continues to transform as the practice continues. A yoga practice doesn't become boring or tiresome, if we are practicing awareness along with alignment. In fact, it is this awareness that carries over into our life off the mat. Yogi Desai would say "The physical benefits of yoga are simply side effects of your yoga practice" because it is the inner work of yoga that brings unity to body, mind and spirit. But, because you are working in new ways with your body, I will begin with the physical benefits, which will encourage you to continue your practice on the mat!
While yoga is never considered a cure for ailments, many people have astounding results with regular practice. I believe it is safe to say that any gentle, regular yoga asana practice will improve your physical health to some degree.
The internal massage of all organs, glands, and systems of the body results in the following benefits:
Digestion and elimination improve; organs and glands do their work more efficiently, resulting in release of toxins and de-stressed muscles; increased blood circulation, and more oxygen in the blood increase energy.
Pressing into the floor stimulates bone growth and can decrease risk of osteoporosis.
Muscular strength and flexibility increase, helping prevent injuries.
Balance improves.
Deep breathing releases stress, increases lung capacity, and energizes the body while calming the mind. Breathing exercises can relieve asthma if done daily.
Yoga asana practice can relieve low back pain, sometimes immediately. Inverted postures such as Shoulder Stand, even the modified versions, can lower blood pressure. Gentle twists can realign the spine. Postures that squeeze the upper back and stretch the neck can relieve headaches.
Many people find that their sleep improves with yoga practice.
The inner benefits of a regular yoga practice usually appear first in regard to temperment. As the student learns to slow the breath down and to be more aware of feelings, it becomes more natural to breathe, relax, feel, watch and allow off the mat. So, instead of reacting habitually in certain situations, you begin to respond consciously because you are training yourself to control the mind rather than "flying off the handle" as you used to do. You may notice that as you are stopped by a red light you choose consciously to breathe slowly until the light changes, instead of choosing unconsciously to become anxious or angry. If someone pulls out in front of you, you switch from fear or anger almost immediately into calmly focusing on your driving, and realize we all make mistakes.
Moms become more patient with their children; spouses become more patient with each other; and we become more patient and forgiving with ourselves.
It is at this point that you can begin to realize how yoga practice can affect weight loss. As we become more conscious of what we are doing and how we are being off the mat, we become more conscious of how and what we are eating. (Sorry if you were expecting a magic posture or two to cause you to lose weight!)
Sitting down to a meal, we can gaze at a plate of food, smell the fragrances, and become conscious of what we are about to do: put life-sustaining food into our body! Then we proceed to eat consciously, chewing each mouthful thoroughly before swallowing. Chewing thoroughly has the added benefit of causing us to be satisfied with less food! Try chewing each mouthful 40 chews before swallowing, and see what happens!
A "yogic" diet consists of as many natural, unprocessed foods as possible; eating only until the stomach is 3/4 full and then stopping for at least 2 hours; eating only when hungry (not "craving"); and drinking water and/or taking long, deep breaths to ward off cravings.
As your asana practice improves your well-being and increases your flexibility, you will feel more like getting out for a daily walk or jog, taking part in a sport, or putting on some music and dancing. In other words, you'll feel more like moving. Acknowledging that the best method of losing weight is eating healthier and moving more, voila! yoga helps with weight loss!
HELP FOR WEAK WRISTS AND ROUND BODIES
Notice in the photo below that I am demonstrating Seated Forward Extension, or Posterior Stretch with the use of several props: cushions under the tailbone, and a rolled blanket under the knees. If you have "belly issues" or what we call a "round body" notice that you can use your hands to press the belly toward the spine as you come into the forward position. Once you are extended forward, the belly stays pressed toward the spine as you extend forward, giving you more range of motion, and allowing you to breathe more easily. Follow previous instructions for Seated Forward Extension.


Notice in the photo below that I am demonstrating Seated Forward Extension, or Posterior Stretch with the use of several props: cushions under the tailbone, and a rolled blanket under the knees. If you have "belly issues" or what we call a "round body" notice that you can use your hands to press the belly toward the spine as you come into the forward position. Once you are extended forward, the belly stays pressed toward the spine as you extend forward, giving you more range of motion, and allowing you to breathe more easily. Follow previous instructions for Seated Forward Extension.
When the wrists are weak, or the body is heavy, putting a strain on the wrists, use blocks, firm cushions, or even thick books under the hands. This sends more weight onto the legs and feet, relieving the wrists.
Traditional Child Pose which is often used as a counter-pose for back-arching postures, can be difficult for a round body. An effective alternative is to do Upward Facing Child Pose as demonstrated below. The rounding of the back in this posture provides a successful counterpose, and in addition, you can rock gently back and forth to massage tension out of the back!
Here are two more postures, Half-Circle Pose and Inclined Plane in which we can use a block to relieve stress on the wrists.
Whenever you feel strain or discomfort in a pose, experiment with props to help you come into
"a still easy place" which is what the word asana means. If the body is tense, the muscles can't stretch, and your breathing will be restricted. You want to be able to hold a posture for 5 - 8 breaths.
Remember the watch-words: BREATHE - RELAX - FEEL - WATCH & ALLOW in each posture. As my teacher, Yogi Amrit Desai would say, "We are not practicing conflict; we are practicing yoga!"
Friday, September 26, 2014
SESSION FOUR "The Squeeze"
The previous session included warm-ups and a gentle routine you can use with all that you've learned so far. Today we will do a couple of standing poses, and then, in Yoga Notes below, I will recommend some good books and DVDs for home yoga practice. From here on, I will occasionally demonstrate postures, but mostly I plan to give you some yoga teachings that will help you take your yoga off the mat, regardless of your level of experience, and I also want to help those with "round bodies" with some modifications just for them.
Last time I introduced you to Staff Pose as part of your yoga routine. This is a great pose for aligning the posture in preparation for any seated poses. The spine is long, shoulders back and down, legs extending out through the heels. The front of the torso is open for easy breathing, so begin by inhaling a breath, and then on an exhalation, move into your forward bending or twisting or lifting pose.
Always work with the breath as accompaniment to movements and in holding. This helps the muscles to stretch in different positions of the body and increases flexibility, as well as opening areas of the body to the flow of "prana" or "life force"--that element that leaves you relaxed as well as energized after your yoga practice!
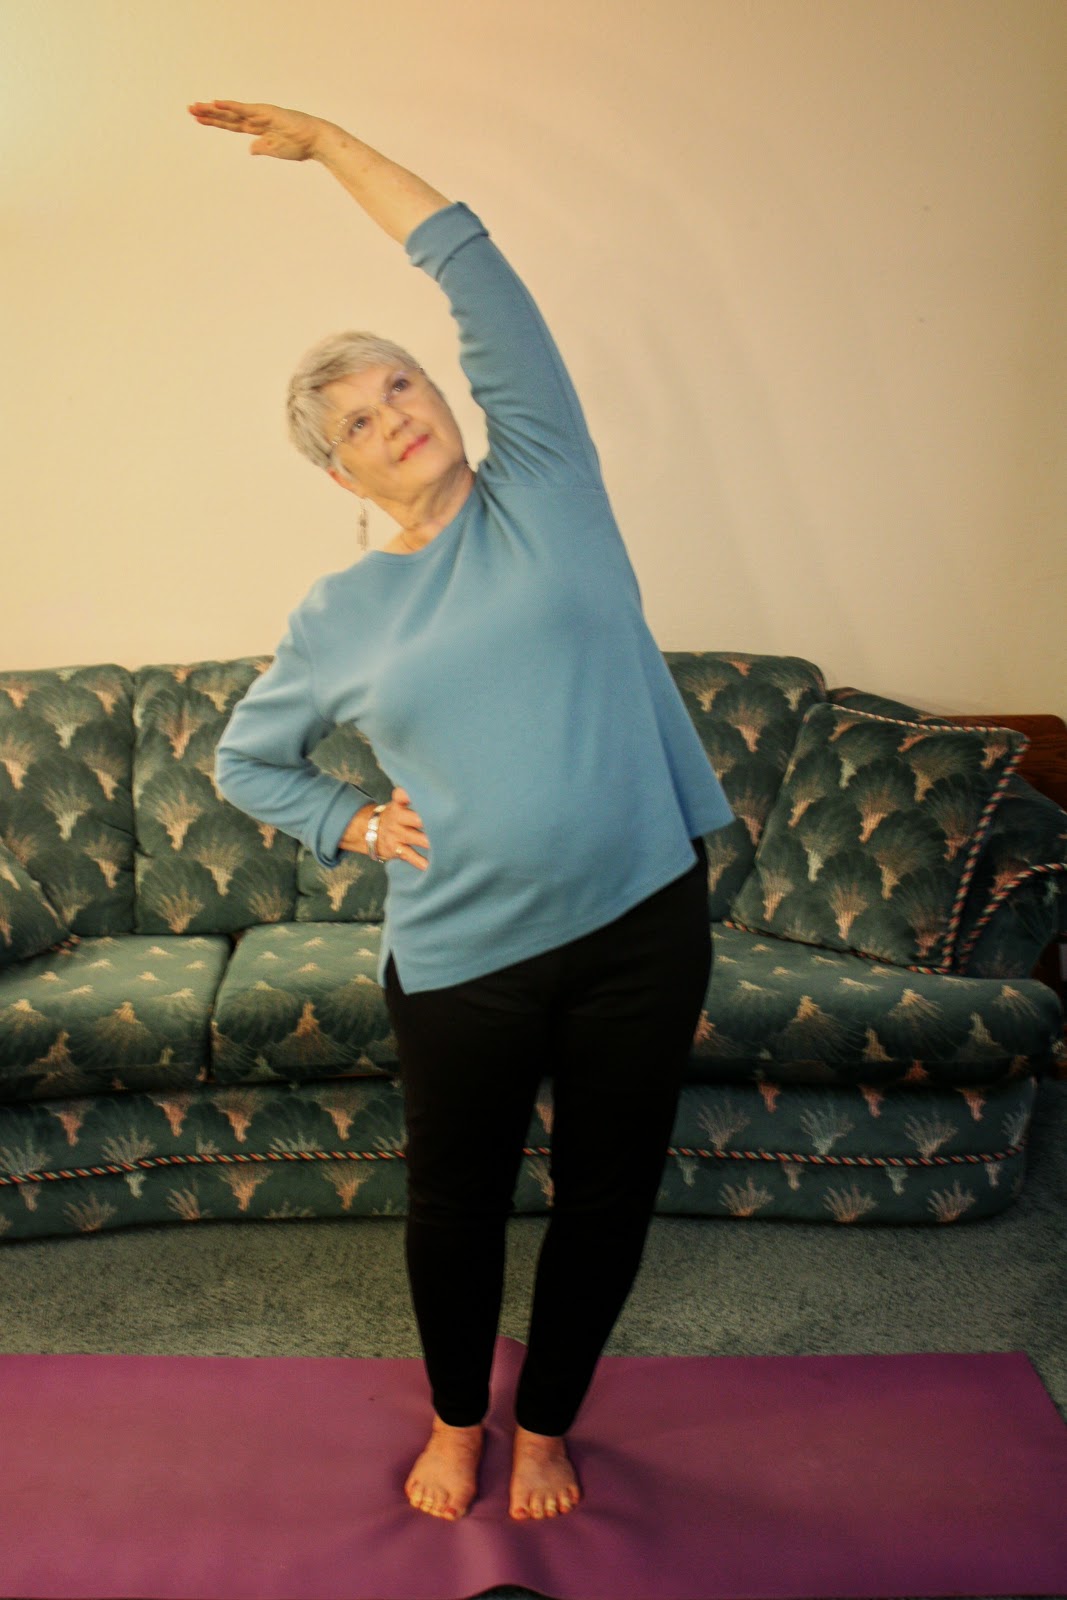
In the photo below I am demonstrating "Mountain Pose". This posture gives a feeling of being grounded and steady, like a mountain, with energy flowing upward, lengthening and opening the body through the torso and arms.
For steadiness in the posture, bring up a lifting squeeze in the buttocks, and feel how this firms the legs and the belly and supports the spine. "The Squeeze" is a simple name for mula bandha, or "root lock" which is an internal lifting upward through the core of the body, from perineum to the back of the throat, ending in a soft smile. We implement the Squeeze as a protection for the lower back. When maintained, the Squeeze gives added support to the spine as it twists, and as it bends forward or backward or side to side. Make it a habit to employ The Squeeze in all your standing postures, and even in some others, as we'll do later, to create safety and more effective postures.


Yoga Notes: Now that you have learned a few basics, you can benefit from some books designed to help you practice yoga at home. For beginners, seniors, and anyone who wants a gentle practice, I recommend a book that has been around for decades and has introduced thousands of people to yoga in their own homes:
Richard Hittleman's Yoga 28-Day Exercise Plan, pub. by Workman Publishing Co. Inc., NYC. Photos and simple text allow you to follow this easy-to-use program for 28 days and really see results!
Lilias! Yoga Gets Better With Age by Lilias Folan, pub. by Rodale Press. Lilias Folan has been teaching yoga for decades. You may remember her as the young woman with the long braid teaching yoga on PBS TV years ago. The braid is gone, but the pleasant demeanor and yoga expertise remain! Any of Lilias' books, videos and DVDs will give you excellent, gentle, effective yoga instruction. I've taken a workshop from her, and she is delightful.
Ageless Yoga: Gentle Workouts for Health & Fitness by Juliet Pegrum, pub. by Sterling Pub. Co., Inc., New York is a very helpful book, using props that include a chair--so helpful!--with lots of photos, and basic yoga exercises that you can do safely. Some of the photos show an instructor assisting the student, which can be very helpful for you at home, as you can then imagine the instructor assisting you in the same way.
DVDs from Kripalu Center for Yoga & Health are available for all levels, with clear instruction. I also recommend DVDs (or old videos) by Lilias Folan (Gentle yoga) and Rodney Yee (Gentle to Intermediate & Advanced).
Beware of DVDs that do not instruct you in modifications and safety, but just expect you to follow a model with a super-flexible body, as if we should all be able to do what they do! NOT SAFE!
Next time: Yoga helps for round bodies!
The previous session included warm-ups and a gentle routine you can use with all that you've learned so far. Today we will do a couple of standing poses, and then, in Yoga Notes below, I will recommend some good books and DVDs for home yoga practice. From here on, I will occasionally demonstrate postures, but mostly I plan to give you some yoga teachings that will help you take your yoga off the mat, regardless of your level of experience, and I also want to help those with "round bodies" with some modifications just for them.
Last time I introduced you to Staff Pose as part of your yoga routine. This is a great pose for aligning the posture in preparation for any seated poses. The spine is long, shoulders back and down, legs extending out through the heels. The front of the torso is open for easy breathing, so begin by inhaling a breath, and then on an exhalation, move into your forward bending or twisting or lifting pose.
Always work with the breath as accompaniment to movements and in holding. This helps the muscles to stretch in different positions of the body and increases flexibility, as well as opening areas of the body to the flow of "prana" or "life force"--that element that leaves you relaxed as well as energized after your yoga practice!
In the photo below I am demonstrating "Mountain Pose". This posture gives a feeling of being grounded and steady, like a mountain, with energy flowing upward, lengthening and opening the body through the torso and arms.
For steadiness in the posture, bring up a lifting squeeze in the buttocks, and feel how this firms the legs and the belly and supports the spine. "The Squeeze" is a simple name for mula bandha, or "root lock" which is an internal lifting upward through the core of the body, from perineum to the back of the throat, ending in a soft smile. We implement the Squeeze as a protection for the lower back. When maintained, the Squeeze gives added support to the spine as it twists, and as it bends forward or backward or side to side. Make it a habit to employ The Squeeze in all your standing postures, and even in some others, as we'll do later, to create safety and more effective postures.
This posture is "Half Moon" demonstrated first with one hand on the hip (sometimes called "Quarter Moon") for those with a weak lower back, and again with both arms extended overhead. The Squeeze is engaged as the hips are alternately pressed out to the side, to bring the body from Mountain Pose into the arched position of Half Moon. During the hold, imagine your deep, slow breaths are moving in and out between the ribs of the extended side. Come slowly back to Mountain, and repeat to the opposite side. Be careful to stay in one plane in this pose, not drooping forward or dropping back.
This pose strengthens the ankles, legs, torso and back muscles, and opens the body for deep breathing. It is a balance of strength and flexibility, and an opportunity to notice where in our life we might be too rigid with ourselves or others; where we might stand up for ourselves more; what we actually stand for in our life; how bending a little might allow life to be a little easier for us, etc. As you become familiar with the posture, use the holding time to breathe fully and contemplate these things as they apply to you today. Add Mountain and Half Moon to your daily routine!
Richard Hittleman's Yoga 28-Day Exercise Plan, pub. by Workman Publishing Co. Inc., NYC. Photos and simple text allow you to follow this easy-to-use program for 28 days and really see results!
Lilias! Yoga Gets Better With Age by Lilias Folan, pub. by Rodale Press. Lilias Folan has been teaching yoga for decades. You may remember her as the young woman with the long braid teaching yoga on PBS TV years ago. The braid is gone, but the pleasant demeanor and yoga expertise remain! Any of Lilias' books, videos and DVDs will give you excellent, gentle, effective yoga instruction. I've taken a workshop from her, and she is delightful.
Ageless Yoga: Gentle Workouts for Health & Fitness by Juliet Pegrum, pub. by Sterling Pub. Co., Inc., New York is a very helpful book, using props that include a chair--so helpful!--with lots of photos, and basic yoga exercises that you can do safely. Some of the photos show an instructor assisting the student, which can be very helpful for you at home, as you can then imagine the instructor assisting you in the same way.
DVDs from Kripalu Center for Yoga & Health are available for all levels, with clear instruction. I also recommend DVDs (or old videos) by Lilias Folan (Gentle yoga) and Rodney Yee (Gentle to Intermediate & Advanced).
Beware of DVDs that do not instruct you in modifications and safety, but just expect you to follow a model with a super-flexible body, as if we should all be able to do what they do! NOT SAFE!
Next time: Yoga helps for round bodies!
Thursday, September 25, 2014
Session 3 Warm-Ups and Your First Yoga Session (Be sure to read "Yoga Notes" at end of post!)
Now you have all your props assembled within reach, so use them as you see fit, if I don't mention it!
Today we will do a few simple warm-ups which can be repeated a second time from beginning to end, to create a gentle, beginner level yoga session.
These warm-ups loosen up the spine, shoulders, and neck, massage the abdomen, and help you breathe deeply.
Sitting on your cushions, pelvis tilted forward, back long, begin to gently turn from side to side, twisting at the hips. (Without the cushions, your twist will be less free and easy.) You may want to just swish gently back and forth in a continuous movement a few times to warm up your spine, exhaling an audible "Ha!" breath over your shoulders, and then twist to one side and hold at a point where you just begin to meet with resistance, while you breathe slowly and deeply a few breaths. Then repeat to the opposite side.
The next six photos show a series of movements called "The Six Movements of the Spine", which you begin by coming into "Table Pose" on all fours, hands directly under the shoulders, and knees directly under the hips, hip-width apart..
The first 2 photos demonstrate "The Cat Stretch" where the spine is moved up and down, first rounding the spine up and pulling the belly muscles up as well, as you exhale the breath, and tucking the chin and tailbone under...
...then dropping the belly down on an inhalation, lifting the tailbone and chin up a bit. This is done in a continuous, gentle motion, or with pauses if you like in each extreme position. Repeat several times, and feel your spine flexing like a garden hose.
The next two movements are side-to-side, exhaling as you press ear to shoulder and shoulder to hip, then inhaling to center, and exhaling as you curve around to the other side.
Again, the movement can be continuous, or you can hold and breathe at the extreme position.
The final movement is a twist, called, interestingly enough, "The Twister." Begin by lifting the right arm up to the side and taking in a breath. As you exhale, slide that arm under the left, bring your ear and shoulder to the floor (or, modify by resting your ear on a cushion) and stretch the right arm along the floor.
Finally, reach the left arm up and slowly circle it around in a counter-clockwise direction to rotate the shoulder. Inhale as the arm circles upward, opening the left side of the chest, and exhale as the arm circles downward. Repeat the shoulder rotations 4 or 5 times.
You will repeat this on the opposite side, but circling the right arm around and around in a clock-wise direction. BE SURE TO BREATHE ALONG WITH YOUR MOVEMENTS!
And now, you can create your First Yoga Routine by combining what you have learned so far:
Begin in Easy Pose, on your cushions, eyes closed, and crown pressing upward to elongate your spine. Relax your shoulders down your back. Smile gently. Take some full, slow breaths in and out through your nose, feeling your belly move outward as you inhale, and drawing it gently in as you exhale. Focus on your body, as you breathe, relax, feel, watch and allow. When you feel centered in your body, proceed with the following, using props as needed:
Seated Gentle Twists 8-10 times. Remember to "HA!" over your shoulder as you swing back and forth; then hold & breathe 5 full, slow breaths, to one side and then the other. Rest briefly.
Six Movements of the Spine Remember to BREATHE with each movement. IMPORTANT!
Pause and rest briefly.
Seated Forward Extension Hold the pose for 5- 8 breaths, releasing any unnecessary tension. As you exhale, notice if your torso drops you a little more deeply into the pose. Don't force it!
Fish Pose If not using a bolster, hold the pose for 5 - 8 deep breaths, dropping the shoulders toward the floor to broaden and open the chest. Then rest briefly on your back. If using a bolster, hang out here as long as you like.
Roll to one side and come to Staff Pose. Press the hands into the floor as if lifting yourself off the floor. This pressing strengthens the arms and wrists and helps prevent osteoporosis by stimulating bone growth. Hold and release as many times as you like.
Repeat the sequence of postures from the beginning. Remember the breath. Relax excess tension. Feel what's happening in your body, rather than being concerned with how well or how poorly you are doing. Watch how sensations and flexibility change as you go along. Allow your body to do just as well as it can TODAY, without any judgements.
When you finish with the Staff Pose the second time, assume Corpse Pose and relax deeply, body, mind and spirit (remember those visualizations!) for at least 5 minutes. Then wiggle fingers and toes, roll to one side, and gently sit up. Notice how you are feeling!
THIS SIMPLE PRACTICE HAS GREAT BENEFITS ON ALL LEVELS!
THERE! You've had your first Home Yoga Class! Jai Baghwan! (I honor your sacred spirit!)
Next time: Standing on our own two feet!
YOGA NOTES
Breath work in yoga is one of the things that sets yoga apart from other forms of exercise. Even though your movements are often slow and gentle, when deep breathing accompanies the postures, muscles are more fully expanded and stretched, the lymphatic system and the digestive system are stimulated to help cleanse the body of toxins, and tension is more completely released. The lung capacity increases (wonderful for asthmatics) and more oxygen is taken into the blood as it passes through the lungs, increasing energy and vitality. With each deep breath the heart is given a little tug that is important to heart health.
Yoga without the breath work is simply a stretch class. You will often forget to breathe deeply during your yoga practice, we all do! It may help to make a sign reminding you to "Breathe!" to post near your mat when you practice. In fact, put some sticky notes around your home and in your car, to remind you to take some deep breaths during your day to release tension and to bring your awareness into the moment. It works! I've tried it!
Wednesday, September 24, 2014


Your last assignment was to spend the day observing yourself as you walk, sit, eat, breathe, etc. What did you learn about yourself? Notice anything you'd like to change? Did you decide to keep a Yoga Journal to record your observations on and off the mat? And were you able to assemble the recommended props?
Today we'll learn how to use the props.
Notice in the top photo, "Easy Pose" doesn't look so easy! Tight groin muscles cause the spine to round and the knees to stick up. In this position the body feels tense and uncomfortable, the back quickly becomes tired and the chest is compressed so the breath cannot enter the lungs fully.
Notice in the second photo how sitting on the edge of the cushions lifts the hips, releasing the groin muscles, so the knees drop more comfortably, and, most importantly, the spine straightens and lengthens, the shoulders can roll back and down, and the chest opens up as the front of the torso extends. Now the breath can flow easily in and out of the lungs, and the whole body is more relaxed. This is why you need those nice firm cushions! Use more than two as necessary to feel that you are truly in "Easy Pose".

Notice in the above photo how in "Seated Forward Extension" the back is rounded, the shoulders hunched, and the arms are straining for the feet. This posture is intended to extend and lengthen the spine and give a stretch to the hamstrings. But in the above version, there is way too much tension in the body for the muscles to successfully extend.

With the use of props, the hips are lifted so the back extends forward without rounding, thereby relieving any strain in the lower back. The crown of the head can press forward to enhance the stretching of the back muscles. The strap allows the arms to "grasp the feet" without strain, keeping the shoulders relaxed away from the ears, the chest open for full breathing, and the buttocks and hips can relax to help the hamstrings stretch. Gaze out over your feet toward the opposite side of the room, rather than rounding the spine to look at your legs. Breathe fully and slowly, relax all unnecessary tension, feel the areas that are opening, watch the subtle changes that happen as you hold the posture, and allow your body to accept the posture on its own level.

This is "Fish Pose". It decompresses the lower back and digestive system, strengthens the arms, opens the chest and throat, and arches the back. The weight is supported by the arms, hands palms down under the buttocks, which press into the hands as the spine lifts and the head drops gently back. This is an excellent pose for counteracting the effects of sitting for long periods, and is good for asthmatics.

This is a lovely modification of Fish Pose, using props. Maybe your arms are still a little weak, maybe you have difficulty arching the back. Try different sized bolsters. This one is just a tad large, so there is a folded blanket behind my head so my head doesn't have to hang back so far. You can use a rolled up blanket for a bolster (which is all mine is, and I made a simple cover for it). The bolster allows you to stay comfortably in the pose longer, getting more stretch through the front of the body.
So, if you feel "like a fish out of water" in Fish Pose, try using a bolster!

Ahhhhh! Here's the pose we love! This is "Corpse Pose", done at the close of every yoga class. This is considered by some adepts to be the most difficult pose. Why? Because it isn't easy at first for most of us to really let go and relax completely. Please do not skip this pose! This 5 minutes or more at the end of your yoga practice should be taken seriously. This is the time when your body integrates all the benefits of your practice, and the more relaxed you are, the deeper the integration. This includes your mind, so substitute all those busy thoughts about the rest of your day, with visualizations of floating on an air mattress in a sunny blue lagoon, or riding a magic carpet dreamily through outer space, or lying in a grassy field of wild flowers. Smile a little. Even sigh out loud!
Some people can splatter themselves out on the floor and immediately space out in La La Land. For those of us not quite so spacey, try a bolster behind the knees to release low back tension, a rolled hand towel behind the neck (you won't believe how nice this is until you try it) and a soft folded cloth over your eyes to block out light and to help your eye muscles relax. I once had a student who couldn't still her twitchy hands during deep relaxation, so I found two smooth stones, the size of her palms, to rest in her hands. That solved her twitchy problem!
These are the basic props to have on hand. Yoga blocks are also helpful, and if you don't have a couple, that's OK, we'll improvise as we need them.
Next time: Warm-ups and some gentle postures to form your first yoga session on the mat!
Tuesday, September 23, 2014
Welcome to Sally's Yoga at Home

Open your heart, open your mind, and let yoga enrich your life!
Welcome to my living room, where I will use my years of experience to help you learn to practice yoga postures safely, no matter your body build or skill level, right in your own home. I will give you precautions, show you how to use simple props that you already have around your home, and explain how you can make yoga work for you in your daily life in fun and interesting ways.
First of all, let me say that you can do yoga safely at home. However, if you want personal help, find a gentle yoga class with an instructor who watches the students and gives hands-on assists in the postures, encourages you to modify postures to suit your body, and cautions you if you have health issues regarding blood pressure, weight, joint or spinal problems, heart problems, etc. A good teacher knows what is going on with each of her students and creates safety for each one. I'm sorry to say these teachers are sometimes hard to find. Many teachers will let you observe or join in a class without charge the first time. It helps to let a teacher know what you are looking for. Accommodating you might well make her a better teacher!
Yoga is about consciousness, so your first lesson is to become more conscious of how you are breathing throughout the day, more conscious of what you are putting in your mouth, and more conscious of how you stand and sit and walk. This is not about criticizing yourself, but just an exercise in noticing. You might even start a simple yoga journal, and write down some of the things you notice about yourself. But don't make judgments!
Another thing you can do is gather some props. Here's what I recommend:
1)The only thing you need to buy is a "sticky mat". These are sold at WalMart, Target, and other stores, ranging in price from $10 -$20. Be sure your mat is indeed a STICKY mat, not just a padded exercise mat, but a mat that will actually keep your bare feet from slipping when you stand with your legs are wide apart. They are made of neoprene, nothing else, and are about 62" or more long when unrolled, and about 2 feet wide, and about 1/4" thick. You need this whether you work on a carpeted or hard surface.
2) An old necktie, soft belt, or narrow cotton scarf, to use as a tie--at least the length of a man's necktie. (Available at thrift stores for very low prices.)
3) Two very firm cushions, about 12" square. They need to be firm so that when you sit on them, they actually hold your bum off the floor 2" - 4" inches. Squashy pillows are no help whatsoever, and that's probably all you'll find in the stores, so go to a thrift store where there will be a bin of older, firmer pillows, and wash them or put pillow slips on them.
4) Optional props include a blanket (various uses), a rolled hand towel to put under the back of your neck, and a soft washcloth to cover your eyes during relaxation.
Our first class will incorporate some or all of these, so be ready!
Subscribe to:
Comments (Atom)